aintaining the beauty and longevity of your floors requires careful cleaning practices. Many common cleaning errors can lead to visible damage, such as scratches, fading, and dullness. Understanding these mistakes and how to avoid them is key to preserving your floors’ appearance and value.
Common Cleaning Mistakes that Damage Floors
1. Using the Wrong Cleaning Supplies
Not all cleaning supplies are created equal. Using incorrect products can lead to floor damage, including fading and scratches.
- Abrasive cleaners: Avoid abrasive sponges, pads, and cleaners. These can scratch and dull the surface of your floors.
- Harsh chemicals: Solutions containing harsh chemicals like bleach or ammonia can cause permanent stains or fading.
Solution: Test cleaning products in an inconspicuous area, like a closet or under furniture, before applying them to the entire floor. For new floors, use cleaning products approved by the manufacturer to avoid voiding the warranty. Opt for pH-neutral products and consider using homemade solutions made from ingredients like vinegar and baking soda, or cleaners with green labels to avoid harmful chemicals.
2. Neglecting to Sweep or Vacuum
Before mopping or deep cleaning, sweeping or vacuuming is essential. Skipping this step can cause more damage.
- Grit and debris: Failure to remove grit, gravel, and other tracked-in debris before mopping can result in these particles scratching the floor as you clean.
Solution: Vacuum carpets and sweep hard floors before deep cleaning. This removes deep-seated grit and helps prevent scratches.
3. Using Too Much Water and Cleaner
Applying excessive amounts of water and cleaner can cause significant damage.
- Puddles and stains: Leaving puddles behind can permanently stain surfaces and flooring, especially wood and laminate.
- Warping: Excessive moisture can seep between planks, causing them to warp.
Solution: Avoid applying an excessive amount of cleaner. Wipe down all surfaces and flooring after cleaning to remove any extra liquid. Use a microfiber mop to avoid water retention.
4. Steam Cleaning Wood Floors
Although tempting, steam cleaning is not suitable for wood floors.
- Moisture damage: Steam cleaners can leave excess moisture on floors, leading to stains and permanent damage.
- Warranty issues: Using a steam cleaner on wood floors may void the manufacturer’s warranty.
Solution: Avoid steam cleaning wood floors. If unsure about the correct cleaning method, consult flooring professionals.
5. Washing Windows on a Sunny Day
Washing windows on a sunny day might seem ideal, but it can lead to streaks.
- Rapid drying: The sun can cause window cleaner to dry too quickly, leaving streaks behind.
Solution: Avoid washing windows on sunny days to achieve streak-free results.
6. Scrubbing Carpet Stains
While scrubbing is effective for grout or walls, it damages carpets.
- Fiber damage: Scrubbing carpet stains can damage the carpet fibers.
Solution: When tackling carpet stains, blot at the stain instead of scrubbing. For stubborn stains, consider contacting a professional carpet cleaner.
7. Using the Wrong Vacuum Setting on Hardwood Floors
Hardwood floors and carpets require different vacuum settings. Using the wrong setting can cause scratches.
- Beater brush: Attachments like beater brushes are effective for carpets but can scratch hardwood floors.
Solution: Avoid using vacuum attachments on wood floors. Use the vacuum as is or use attachments specifically designed for hard floors or look for vacuums that come with attachments specifically designed for such surfaces.
8. Mopping Hardwood Floors with a Dripping Wet Mop
Too much moisture is detrimental to hardwood floors.
- Dents and warping: Excess water can lead to dents and warping of the floorboards.
- Mold growth: It also increases the risk of mold growth.
Solution: Wring out the mop thoroughly to prevent excess moisture. Use a microfiber mop instead of a sponge mop.
9. Cleaning Hardwood Floors with Abrasive Tools
Using abrasive tools can cause scratches on hardwood floors.
- Scratching: Tools like steel wool, hard-bristled brushes, and scrapers can damage the flooring.
Solution: Use soft-bristled brushes, sponges, and microfiber mops to clean hardwood floors without causing damage.
10. Spraying Harsh Chemicals on Hardwood Floors
Harsh chemicals can cause damage like stains and fading.
- Permanent stains and fading: Harsh chemicals can backfire, leading to permanent discoloration.
Solution: Opt for homemade solutions or cleaners with green labels to avoid harmful chemicals.
11. Walking on Wet Hardwood Floors
Walking on wet floors can negate cleaning efforts and cause damage.
- Tracking: It can lead to additional damage, especially in households with pets and children.
Solution: Block off cleaned areas and allow the floor to dry properly before allowing traffic.
12. Keeping Too Much Time Between Professional Cleanings
Even if the floor appears clean, regular professional cleaning is essential.
- Hidden dirt: Even without visible dirt, floors should be professionally cleaned at least twice a year.
Solution: Engage professional cleaning services to remove stains and scratches and protect the floor from further damage.
See also: How to Soundproof a Basement: Essential Tips & Techniques
Vinyl Floor Cleaning Mistakes
1. Going Long Periods Without Sweeping or Vacuuming Vinyl Floors
Accumulated dirt and debris can cause scratches and dullness.
- Scratches and dulling: Dust, dirt, and debris build up and get dragged across the floor, causing damage.
Solution: Sweep or vacuum daily, focusing on high-traffic areas to prevent debris buildup.
2. Using the Brush Roll When Vacuuming Vinyl Floors
The brush roll can cause damage to vinyl floors.
- Scratches and scuff marks: Rotating bristles can scratch and scuff the surface of the floors.
Solution: Switch off the brush roll before vacuuming or use a canister vacuum with a cleaning head designed for hard floors.
3. Using a String Mop on Vinyl Floors
String mops leave too much water behind, which can damage vinyl floors.
- Dulling and warping: Excess water can dull the finish or seep between planks, causing them to warp.
Solution: Use a spray mop with a microfiber pad to control the amount of water applied and leave less liquid on the surface.
4. Scrubbing Vinyl Floors with Steel Wool or a Stiff-Bristled Brush
Abrasive tools can scratch the surface of vinyl floors.
- Surface scratches: Steel wool and stiff-bristled brushes can scratch the surface, making it look unsightly and attracting more dirt.
Solution: Use a soft sponge with warm water and mild dish soap to remove stubborn messes without damaging the floor.
5. Using Bleach or Ammonia on Vinyl Floors
These chemicals can damage the finish of vinyl floors.
- Finish damage: The high pH levels and corrosive nature of these chemicals can dull the finish, cause brittleness, or make the floor look worn.
Solution: Stick to pH-neutral products, such as a solution of water and mild dish soap, to clean vinyl floors safely.
6. Adding Too Much Soap to Your Mopping Solution on Vinyl Floors
Excessive soap can leave residue that attracts dirt.
- Sticky residue: Too much soap can leave a sticky residue that attracts dirt and debris.
Solution: Carefully measure the dish soap; about half a teaspoon per gallon of water is sufficient.
7. Cleaning Vinyl Floors with Dirty Mop Water
Using dirty water spreads dirt rather than cleaning the floor.
- Spreading dirt: If the water isn’t changed frequently, dirt is simply spread across the floors.
Solution: Change the water frequently, rinsing the mop head in a separate bucket or under the faucet before re-dipping it in the cleaning solution.
8. Using a Steam Cleaner on Vinyl Floors
Steam cleaners can damage vinyl floors due to excessive moisture and heat.
- Moisture penetration: Moisture can penetrate between the seams, causing mold and swelling.
- Heat damage: Heat can warp or peel the vinyl planks.
Solution: Avoid steam cleaning vinyl floors to prevent moisture and heat damage.
9. Leaving Your Vinyl Plank Floors to Air Dry After Mopping
Moisture left behind can cause damage.
- Water damage: Even with proper mopping techniques, some water is left behind, which can cause damage.
Solution: Dry the floors with a clean, dry microfiber pad or towels after mopping to prevent moisture damage and streaks.
10. Failing to Clean Up Spills Promptly on Vinyl Floors
Allowing spills to sit can cause warping and staining.
- Warping and staining: Spilled liquids can seep between planks and cause warping or leave stains.
Solution: Prioritize cleaning up spills immediately to prevent unnecessary damage.
11. Applying Polish or Wax on Vinyl Floors
Vinyl floors do not require wax or polish and can be damaged by these products.
- Buildup and damage: Polish or wax creates a sticky buildup that attracts dirt and can damage the upper layer of the vinyl planks.
Solution: Avoid applying polish or wax to vinyl floors, as they are not needed and can cause harm.
12. Failing to Protect High-Traffic Areas on Vinyl Floors
Without protection, high-traffic areas can wear down quickly.
- Scratches and wear: Dirt and debris tracked onto floors can cause scratches and wear down the finish over time.
Solution: Use runners, rugs, and mats in high-traffic areas, such as entryways and hallways, to trap dirt and protect the floors.
Stone Floor Cleaning Mistakes
1. Using Harsh Cleaners on Stone Floors
Stone can be eroded by harsh cleaners.
- Acidity: Cleaners with acidity can affect the stone.
Solution: Employ specified stone floor cleaners, which protect your floors.
2. Not Cleaning Your Stone Floors Daily
Daily cleanings are key to maintaining stone floors.
- Build-up of dirt: Dirt can scuff and damage the surface.
Solution: Keeping up upkeep will extend the lifespan of tile.
3. Using Abrasive Cleaning Materials on Stone Floors
Scrubbing pads cause scratching,.
- Scratching: Scratching removes the sealant.
Solution: Only use soft cloths to protect the floors.
4. Not Regularly Dusting Stone Floors
Dust particles causes the floor to wear.
- Grit: The grit from dust may act as an abrasive.
Solution: Dust mop, multiple times a week.
5. Forgetting to Seal Your Stone Floors
Sealant protect the floors.
- Etching: Sealing the floors, prevents etching.
Solution: Use a sealant every couple of years.
6. Leaving High-Traffic Areas Unprotected on Stone Floors
Floors may sustain damage in highly used spaces.
- Wear: Consistent walking patterns can contribute to the ware.
Solution: Rugs can be used to help protect the stone on the floor.
7. Not Cleaning Messes Up Quickly on Stone Floors
Spills can seep through.
- Staining: Liquids cause staining.
Solution: Wipe the floors regularly.
Prevent scratches and damage to wood floors with the classic “walnut trick.” Simply rub the meat of a freshly opened walnut on the scratch to help fade it. The natural walnut oil can also reduce the appearance of marks.
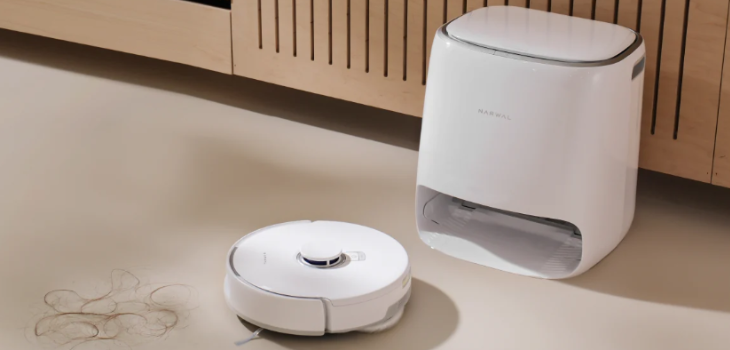
To elevate your floor care routine, consider using robot vacuum and mops. These smart devices provide efficient and consistent cleaning, helping you maintain spotless floors with minimal effort.
By avoiding common cleaning mistakes and choosing the right tools, you can keep your floors looking their best for years to come.